Five Things to Do This Valentine’s Day-That Fills Everyone’s Love Tank!

fivethingstodothisvalentinesday

Love is essential for emotional health and well-being and to feel loved is a primary human emotional need. According to Gary Chapman, author of “The Five Love Languages,”  love can be expressed and experienced in five ways:

-quality time

-words of affirmation

-physical touch

-receiving gifts

-acts of service

We have natural preferences and tendencies to give and receive love in one or two of the five ways listed.

Dr. Ross Campbell, a psychiatrist of children and adolescents, suggests each person has an “emotional tank” that needs to be kept full for optimal health and well-being. When our “love tank” is empty, we do not feel loved, perspective on life seems darker, we may feel irritable, and act out. “A lot of misbehavior in marriage grows out of an empty love tank,” said Dr. Gary Chapman.

Our children have their own love languages and love tanks too. Although, their primary languages will not be established until they are older, it’s important to keep their “love tanks” full by loving them in all five ways. Knowing your own and your family members’ love languages can improve relationships and help see interactions in a new way. Your can discover your love language here.

This Valentine’s Day be intentional with how you love and work to keep love tanks full. Below are a few ideas that reaches each type of love language.

Cooking: (quality time, acts of service, gifts)

For Younger Kids: Valentine’s Day Sparkle Playdough

valentinesdaysparkleplaydough.jpg

Sparkle Playdough Recipe adapted from https://www.iheartnaptime.net/

Ingredients:

-2 cups flour

-3/4 cup salt

-4 teaspoons of cream of tarter

-2 tablespoons of vegetable oil

-red food coloring

-red and silver glitter

-quart size plastic bags

Directions: 

1.) Add flour, salt, and cream of tarter to a large pot. Stir.

2.) Add water, oil, and food coloring.

3.) Over medium heat, stir mixture constantly until dough has thickened.

4.) Separate dough into two bags quart size plastic bags and add silver and red glitter.

5.) Knead the dough in the bag until glitter and food coloring is incorporated and combined.

6.) Have fun!

The playdough can be packaged with a heart cookie cutter and given as a cute Valentine’s Day gift.

valentinesdaysparkleplaydoughgift.jpg


For Older Kids and Adults: 

Try a new recipe and learn a new technique. Here’s a scrumptious recipe for truffles by my friend Stacey. They make a beautiful, thoughtful gift!

 https://www.inthekitchenwithstacey.com/chocolate-truffles/

staceystruffles.jpg


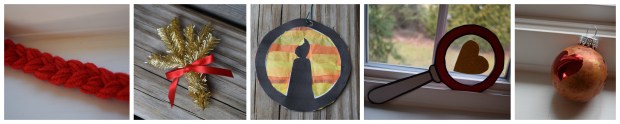
Crafts:  (quality time, receiving and giving gifts)

Younger, Older Kids and Adults: Pull out the craft supplies and lots of glitter and make Valentine’s cards.

valentinesdaycrafts


Older Kids and Adults: Sewing and Embroidery

We did a simple sewing project this week with muslin and embroidery floss. With a pencil, I stenciled a heart on the fabric and embroidered around the traced shape. They added heart after heart in different colors. The end result was so cute, we framed them.

embraceenthusiasmvalentinesdayheart


DSC_1781

Appreciate Love and Others : (words of affirmation, quality time)

Grab a deck of cards and some paper. Write 52 things you love about a person or what you love about being a family. Cut and paste one thing to each card. Hole punch cards and tie together. (This makes a great gift! I gave this set to my husband about five years ago.)

52 Reasons Why I love You
Create a gratitude board with the  100 Things I Love activity. We did this at MOPS a few of years ago as a practice in gratitude. It was a great reminder of all the big and little blessings that make my life richer and more enjoyable. This activity could be done together or separately.

100-things-i-love-activity

Dance Lessons (physical touch, quality time)

Lego Birthday Party - Box Step Feet Dance Steps DiagramGrab a partner and learn a new dance with these fun dance cards from Step Calvert Art.


You can get printable dance cards like the one above at this link: https://stephcalvertart.com/lego-birthday-party-dance-dancing/

Here’s an example: Rhumba

Reading Books: (quality time, physical touch)

reading

One of my favorite parts of the day is when we are all snuggled on the couch with a cozy blanket and a good book. No matter what the book it is, it’s the time spent together, the amazing places you “go”, and the interesting characters you “meet” that makes it such a special time. I also love the great conversations that follow the readings.

Take time to slow down and enjoy your loves today.  Have a very happy Valentine’s Day!

Love,

signature


Nature Print Eggs with Natural Dyes

natureprinteggs

This week we are learning about Romania and I wanted to find a craft to tie into our studies. I searched online for Romanian crafts ideas and pictures of leaf print eggs caught my attention. The eggs are dyed in natural dyes (which also tied in nicely with our medieval studies) and finding the little flowers, ferns, and tiny leaves to imprint on our eggs added to this week’s nature studies. Multi-subject lessons are the best! I’m not sure how Romanian these eggs are but they were fun to make and they are absolutely beautiful.

Just a few words to keep things real, this project was time consuming. From boiling the eggs, preparing the natural dyes, patience with the egg designs and waiting for the colors to come through, and the mess (oh, the mess!! see end of post) this is not your average-throw-a-color-tablet-in-a-cup-of-vinegar-and-add-an-egg type of thing. BUT if you are adventurous and like a good creative-challenge, this project is for you!!! (And my four year old stayed with us and enjoyed the project the whole time, so if he can do it…..)

Materials:

  • white eggs (hardboiled)
  • tumeric
  • beets
  • coffee
  • red cabbage
  • white vinegar
  • water
  • nylon knee highs
  • small hair elastics
  • small flowers, leaves, clovers
  • papertowels

Directions:

1.) Boil the eggs and keep in the refrigerator until ready to use.

2.) Search outside for small flowers, interesting leaves, ferns, and clovers. Cilantro and celery leaves would also work.

2.) Make the natural dyes. I followed Martha Stewart’s directions for dying eggs naturally.

DSC_0012.JPG

DSC_0034

3.) Decorate the eggs. We noticed the condensation on the eggs (from being in the refrigerator) helped the leaves and petals stick better. If the eggshells were dry, we added a little moisture to the leaves to help keep things in place. This cut down on frustration levels for those with little hands. 🙂

dsc_0076.jpg

DSC_0071

4.) Cover decorated egg with nylon. The foot of a knee high works great but since we only had two per package, we had to create our own “foot” with an extra small elastic. Pull nylon tightly around the egg to hold things in place.

DSC_0091

5.) Give the eggs a natural dye bath. The longer the eggs soak, the more vibrant the color. We left the eggs in the dye for a minimum of an hour. See Martha Stewart’s directions for time and color suggestions.

IMG_20170906_171547_342

DSC_0095

6.) Cut off the nylon and peel off leaves and flowers. (We patted the egg dry with a paper towel before we cut the nylon. I am not sure if this make a difference in color but it made the eggs less slippery to work with.)

DSC_0108

7.) Observe and enjoy!!!

DSC_0180

natureprinteggs

And the promised TRUTH…(BUT it was worth it!!!)

DSC_0183


Kindness ROCKS

kindness rocks

Keep your eyes open and you might find one! Love, peace, joy, or a smile! The kids and I have been inspired to spread kindness in the shape of rocks. Following the example of the following four organizations, I bought five bags of black river rocks (at the dollar store.) We painted hearts, rainbows, crosses, smiley faces, and other things that might make one smile and we have been hiding them all over our town.

Our hope is that each rock is found at the perfect moment and it will bring a smile to the finder’s face. If you do find one, we would love to hear about it! We would love to know what happened to the rocks after we left it somewhere.

Check out these beautiful stories of others who are spreading joy and kindness one rock at a time.

Love Rocks  (A beautiful, courageous story of how one family is overcoming loss and grief with love and joy!)

The Kindness Rocks Project

Word Rocks

The Rainbow Rock Project (A story that tells you are never to young to make a difference!)

DSC_0186


DSC_0199 (2).JPG


Decorating Easter Eggs with Nail Polish

eastereggs3

Happy Easter!  He is risen! The tomb is empty and we celebrate hope and new life. I hope that you had a blessed day gathered around your friends and family.

Now, I realize that this post may be a little late for this year. Most of us will not be dying or decorating eggs until next Easter but I had to share this nail polish technique. Tuck it away for next spring or boil some eggs and give it a try. I couldn’t believe that it worked so well. Our eggs look like art. They boast bold, bright colors and unique designs and patterns. I was very tempted to boil another couple of eggs just to see what different patterns I could create.

You will need:

  • eggs (hard boiled or blown out)
  • bright colorful nail polish (the more expensive brands worked better than the cheaper polishes)
  • plastic cup
  • water (room temperature)
  • toothpicks
  • plastic gloves
  • newspaper or table cloth
  • paper towels
  • a place for the eggs to dry (egg carton, plate with paper towels)

Directions:

Watch the tutorial below.


Tips:

1.) Decorate eggs in a well-ventilated area. The nail polish smell can be overwhelming.

2.) Cover your table or work area with an old table cloth or newspaper. This can be a messy project.

3.) Be sure to use room temperature water.

4.) We had difficulty using the nail polish brush to drop the nail polish into the cup (see video.) Instead, we carefully tipped the nail polish bottle and let the desired amount polish slowly drop out into the water.

5.) When lowering the egg into the water, hold the egg vertically rather than horizontally. We noticed that the patterns and swirls seemed to come out better this way.

6.) If you do not want to waste eggs, blown out eggs would be work great too. (http://www.wikihow.com/Blow-Out-Eggs)

7.) To fill in any white spaces, dip the nail polished egg into the traditional egg dye.

8.) NOTE: I WOULD NOT ADVISE EATING THE EGGS AFTER DECORATING WITH NAIL POLISH. Instead of eating them, try an egg fight. Egg fights were a fun Easter tradition in our family complete with “trophies” and bragging rights.  https://www.youtube.com/watch?v=1j2yJtea6Ug

Here are some of our eggs:. 

eastereggs1

eastereggs2


DSC_0816


Happy St. Patrick’s Day!


saintpatrick.jpg

Happy St. Patrick’s Day! I hope today brought you more kisses than pinches, shamrocks and rainbows, and laughter and blessings. Tomorrow, I will return to writing about the process of finding a good balance in life and using our time wisely. But today, I wanted to write about a little bit of mischief and a little bit of fun that took place in our house.

On the eve of March 17th, legend says that a “leprechaun” travels from the green hills of Ireland to the green hills of New England to play some harmless tricks while the children sleep.  The “leprechaun” was back and at again this year. “Lenny” made a mess of things. He turned the toilet bowl water green, spread green and white feathers in the bathroom, wrote a message in green sugar sprinkles on the kitchen counter, and left a little note with a small treat.

After the excitement of the tricks wore off, the kids and I took a few minutes to make a new batch of playdough. I added a few extra drops of water and oil to my basic recipe. I think that this made the playdough’s consistency smoother and easier to work with than past batches. Don’t forget the GLITTER!! The glitter is the best part. 🙂 I added two whole tubes of each color.

 Glittering-Green Playdough

  • 1 cup all purpose flour
  • 1/2 cup salt
  • 2 teaspoons cream of tartar
  • 2 tablespoons vegetable oil (plus a few extra drops)
  • 1 cup of water (plus an added tablespoon or two)
  • green food coloring (I like the gel coloring)
  • fine green and gold glitter (at least two small tubes)

In a medium saucepan whisk together the dry ingredients. Next, mix in the water, oil, and green food coloring. Stir until a thick batter is formed. Cook the mixture over a low heat until a thick dough forms. Spoon the playdough onto parchment paper or a plate. Knead until smooth. Makes about 2 cups of dough. I usually double the recipe for use with three kids.

greenglitterplaydough

There is much more to this holiday than leprechauns, parties, parades, and pots of gold. My favorite part of the day was reviewing the life of Saint Patrick. What an amazing man! What a story of faith, answered prayers, and very bad circumstances turned to good for God’s purposes and His glory.  I could tell you the details of his story myself but it may be more entertaining to watch them. I found this Veggie Tales video on the life of St. Patrick. If you have a good sense of humor, you might like it. If Veggie Tales makes you cringe, you may want to Google his life. Either way, I think learning about Saint Patrick will inspire you.


So until tomorrow,

May the road rise up to meet you.
May the wind always be at your back.
May the sun shine warm upon your face,
and rains fall soft upon your fields.
And until we meet again,
May God hold you in the palm of His hand.

————————————————————————–


PS: I am in love with the little “Lenny” note (see above pic) that I purchased from Caravan Shoppe. This is not a paid compliment, just well deserved praise. The Caravan Shoppe is a small business, run by two young families who specialize in digital downloads for home, family, and fun. Their work is creative and affordable. Check them out here! http://caravanshoppe.com/ 

Painting With Snow

Puffy Snow Paint

I am still waiting for a BIG snow storm to arrive. The “Blizzard of 2016” turned out to be a disappointment, dropping a total of zip-zero inches in NH. I am slightly bitter that the snow was redirected to the Mid-Atlantic states and accumulated in the yards and driveways of some of my relatives (who by the way, are not particularly known to be snow lovers.) My lucky brother and sister-in-law got at least 18 inches! Oh, I am so jealous!

I cannot say that we have had no snow this winter. Two weeks ago, a small storm came through bringing a wimpy three inches of snow with it. The kids were able to scrape together a cute, little snowman who stayed around much longer than we expected. Unfortunately, last week’s warmer temperatures did a number on the poor little guy. See picture below. (How about those flip flops???)

cute little snowman

sadsnowman

It seemed about the right time to whip up a little “snow” of my own. My kids love snow paint! Snow painting is an easy-to-make, fun, sensory activity. With snow paint, you can create three-dimensional snowmen and other snow designs that will stay around all winter no matter what the weather report is.

Snow Paint

Puffy Snow Paint Snowmen

You will need:

  • shaving cream
  • school glue
  • glitter (optional)
  • paper plates or bowl
  • spoons or hands to mix with
  • construction paper
  • paintbrush
  • materials for snowman’s arms, mouth, nose, accessories

On a paper plate, mix 1/4 cup school glue to 3/4 cup shaving cream. Add glitter. Combine with spoon. If using your hands, I would recommend blending the materials in a big bowl or on a cookie sheet. It will give you more room to work with and help contain the snow.

Mixing Puffy Snow Paint

Using your finger or a paintbrush, make an outline of a snowman on construction paper. Generously fill the outline in with snow paint. The more snow, the better. The more textured, the better.

Snowman outline

Decorate your snowman as you wish. Use different materials for his arms and face. Give him a scarf or a hat. Be creative. Twigs work great for arms and a background. Fleece and fabric work beautifully for hats and scarfs.

snowmanaccents

Add falling snow and/or a background. Allow paint to dry completely. When dry, the paint will set into a soft, puffy material.

snowmensnowpaint

Embrace Winter! Embrace Creativity!

(This idea is adapted from a  BOZ MOPPETS Lesson)


“100 Things I Love”

100 things I love activity

Everyone is creative in their own way. God has created each of us with different gifts and talents to be used to reflect His goodness and His image. Creativity is not constrained within the arts, it is included in the processes of thinking, planning, and decision making. Sometimes, we need to remove distractions and shift our perspective so that we can find the creativity that God designed us to enjoy.

At our last MOPS meeting, my creative Co-Coordinator came up with this amazing activity to help us “notice goodness,” “embrace rest,” and to “celebrate lavishly.”  We started our meeting by watching an engaging speaker, Kay Morison, talk about the importance of finding our creativity and embrace it as a way to recharge so we can continue to pour into others. She made a point to say that creativity looks differently in all of our lives and it can be found in things like spreadsheets and in runner’s strides.

“Creativity teaches us to be more present in the moment, enjoy the process, and let go of the end result.”

Kay Morrison-Eyes to See…Creativity 

Noticing Goodness Kit

After viewing the video, each mom was given a “Noticing Goodness Kit.” The kit contained cardstock, numbers, mat, a heart, and writing prompts. We organized the items on our paper, glued them in place, and waited for the next instruction. My Co-Coordinator asked us to think about the many things we love and then led us through two or three examples, encouraging us to be creative in how we numbered and wrote the items on our paper. 

“On your paper, write number one. What is the first thing that comes to mind when you think of what you love? (PAUSE) Write number two. What is your favorite smell? (PAUSE)” 

Once we all had a good idea of what we were to do, she sent us off to find a peaceful, quiet space. Then we were left alone with our thoughts, a pen and our paper.

When you are a mom of little ones, you rarely get 30-40 minutes of alone time without interruptions. The time to think was a gift in itself.

It took me three or four tries to find a comfortable, quiet spot. Once I found a space, I did nothing but sat and breathed. The silence was unfamiliar. A good five minutes went by before I pulled out the prompts and things started coming to mind. Sometimes, they came quickly. Word after word. A few times, I got stuck and sat in silence again. I found that there was no particular order of importance and one word/memory often led to many other things that I loved. Before I knew it I had 100 items on my paper. I could have kept going.

I reread my list and realized that I had missed things that I absolutely love- chocolate-chip cookies, apple picking, Santa Claus, running, the 4th of July. I also realized that I missed many memories- Story Land with my family, going to Cape Cod, my wedding, soda floats in chemistry beakers with my grandpa, and watching Days of Our Lives with my aunt.

It did not matter what I missed or how many things I forgot. This was not a checklist-type of activity. No bonus points for the best or most unique item. This was practice in opening our eyes to notice the goodness in the every day, in the smallest moments, with the people who you do life with. It was also helped us embrace rest and to celebrate lavishly in what we accomplished.

You do not have to have a special kit to complete this activity. Grab a piece paper. Find 30 minutes of “quiet” time- maybe at nap time or when the kids go to bed.  Start one at a time and number your items. I think you find yourself opening up as you go. If you get stuck, here are a list of prompts that you can use:  100 Things I Love Prompts

If you need even more inspiration, check out these pins and the different ways others have completed this type of project:

47cf8424f630cbe354480d34025c660d 100 things

https://www.pinterest.com/pin/AY8ichhWgnUDkgUSc6s1DyiIul1JJc6DNunyzFLpTtCXGwgxWIxl4TQ/

936c1ff85216238296c771d3ce8e88f7100things

https://www.pinterest.com/pin/131871095314686653/

1eaaed8f2f645d38cd611e262c983c9e100things

Crafty Island Girl

https://www.pinterest.com/pin/267119821626528980/

e15b7e8f80cc914b697f7fd06523c413100things

https://www.pinterest.com/pin/267119821626529714/

If you do get a chance to do this activity, I would love to hear your thoughts and how you did.

Embrace your creativity!

A Snow & Soup Day- Healthy Greek Lentil Soup Recipe

healthygreeklentilsoup

Today I woke up to a winter wonderland. Three inches of beautiful snow already lay on the ground and big, fluffy snowflakes continue to fall from the sky.  “Snow days” do not change our “schedule.” We still have school, still plan to read books snuggled on the couch, and will still be doing the chores. But snow days somehow make the house seem cozier. And when I think of cozy, I think of thick blankets, warm mugs of cocoa and coffee, and soup.

I am always in search of new soup recipes to try.  I came across the following lentil soup recipe from Angela of Fit Mom-Angel D. Angela writes about fitness and wellness on her blog and has a lot of great recipes to share. Her Greek Lentil Soup intrigued me. I love lentils but for some reason rarely make them. Lentils are inexpensive, packed with high nutritional value, and have many health benefits. They are filled with fiber and are fairly satisfying. This soup is not only healthy but delicious. Kid approved in my house. The recipe makes a lot of servings, so you will have a ton of leftovers.  Leftovers are a gift in my house.

Angela gave me permission to share her Healthy Greek Lentil Soup Recipe. I hope you will try it and enjoy it too.

Healthy Greek Lentil Soup- by Angela D.

PREP TIME: 15 minutes     COOK TIME: 1 HOUR 10 minutes  SERVES: 10

Ingredients:

2 Tablespoons of olive oil

2 celery stalks, diced

4 large carrots or 2 cups baby carrots, sliced

1 large yellow onion, chopped

4 cloves of garlic

1 Tablespoon Dried Oregano

2 Teaspoons Dried Basil

2 cups of dry lentils

1 (24 oz) can crushed tomatoes

1 (14 oz) can diced tomatoes, undrained

1 (32 oz) carton low-sodium chicken broth

4 cups of water

2 cups baby spinach leaves (more of less to your liking)

1-2 Tablespoons lemon juice (the more the better in my opinion)

salt and pepper to taste

Instructions:

1.) Heat oil in a large soup pot over medium heat. Add celery, carrots & onions and cook until tender.

2.) Stir in garlic, oregano & basil, cook 2 more minutes.

3.) Pour in lentils, crushed & diced tomatoes, broth and water. Stir and bring to a boil.

4.) Reduce heat and simmer for at least 1 hour.

5.) Salt and pepper, to taste.

6.) Stir in spinach and lemon juice. Let the spinach leaves to wilt before serving.


Do you have a favorite soup recipe?  If you do, I would love for you to share.


DSC_0933

Two of My Favorite Playdough Recipes

In our house, Christmas is not over until January 2. Only then is the tree allowed to come down, decorations stored away, and the Christmas music turned off until the next year. Before we say goodbye to Christmas, here are two of my favorite Christmas (playdough) recipes. They smell good enough to eat!

DSC_0416

Candy Cane/Peppermint Playdough

  • 1 cup all purpose flour
  • 1/2 cup salt
  • 2 teaspoons cream of tartar
  • 2 teaspoons peppermint extract (more or less to your liking)
  • 2 tablespoons vegetable oil
  • 1 cup of water
  • red food coloring
  • white glitter

In a medium saucepan whisk together the dry ingredients. Next, mix in the water, oil, and the peppermint extract and stir until a thick batter is formed. Cook the mixture over a low/medium heat until a thick dough forms. Divide the playdough in half.  Turn out the halves on parchment paper. One half leave “white” and sprinkle clear glitter over the top. Knead until smooth. Add red food coloring (we use the gel type) to the other half. Knead until smooth. Makes about 2 cups of dough.

Candy Cane Playdough


Gingerbread Playdough

Gingerbread Playdough

(originally from The Sweet Adventures of Sugarbelle )

Note: With three kids, I usually double the recipe so each one has more than enough to play with.

  • 1 cup all purpose flour
  • 1/2 cup salt
  • 2 teaspoons cream of tartar
  • 1 tablespoon ground cinnamon
  • 2 teaspoons ground ginger
  • 1 teaspoon ground nutmeg
  • 1 teaspoon ground cloves
  • 2 tablespoons vegetable oil
  • 1 cup water
  • dash of orange

In a medium saucepan whisk together the dry ingredients. Next, mix in the water, oil, and the orange extract and stir until a thick batter is formed. Cook the mixture over a low/medium heat until a thick dough forms. Turn out on parchment paper and knead until smooth. Makes about 2 cups of dough.

PS  I think of the gingerbread recipe as more wintry than “Christmasy” and make it all winter long.

Gingerbread Playdough


Advent-“Unwrapping the Greatest Gift” Day 11-12-13-14-15 Craft Ideas

day1115
“Unwrapping the Greatest Gift” Ornament and Craft Ideas-Days 11-15

This is Part 4 in a series of ornament/craft ideas that I think correspond with the daily advent readings from Ann Voskamp’s book “Unwrapping the Greatest Gift.”  Read about Day 1-2 here Day 3-4-5-6, and Days 7-10 here. You can find many ideas on the internet for Bible story crafts. Below are some of my original ideas and some that I modified from Pinterest. I gave credit for those craft ideas that I borrowed. If you decide to make and share one of my craft ideas, I would to love to see it. Tag me on Instagram or send me a link to your blog post.

adventday11rahabscarletcord

21 “Agreed,” she replied. “Let it be as you say.”

So she sent them away, and they departed. And she tied the scarlet cord in the window.  Joshua 2:21

Materials Needed:

-Red Yarn

-Optional: small hair elastic

1.)Holding one end of the yarn in your hand, wrap the yarn around your elbow (bent 90 degrees) at least 25 times. You will end up with a loop.

2.) Still holding the loop of yarn. Cut the yarn vertically to open the loop. Tie yarn at one end (or in the middle of the yarn you are still holding.

3.) Braid yarn. Tie with another piece of yarn or a small hair elastic. Look an ornament hook through the top.

adventday12ruth

16 But Ruth replied, “Don’t urge me to leave you or to turn back from you. Where you go I will go, and where you stay I will stay. Your people will be my people and your God my God. 17 Where you die I will die, and there I will be buried. May the Lord deal with me, be it ever so severely, if even death separates you and me.” 18 When Naomi realized that Ruth was determined to go with her, she stopped urging her. Ruth 1: 16-18

22 So Naomi returned from Moab accompanied by Ruth the Moabite, her daughter-in-law, arriving in Bethlehem as the barley harvest was beginning. Ruth 1:22

Materials Needed:

-mini gold tinsel (I found mine at Walmart)

-tape

-red satin ribbon

1.) Cut various lengths of tinsel.

2.) Bundle the tinsel to your liking and secure with tape.

3.) Wrap a satin ribbon around the middle and tie in a bow.


adventday13samueldavid

“7 But the Lord said to Samuel, “Do not consider his appearance or his height, for I have rejected him. The Lord does not look at the things people look at. People look at the outward appearance, but the Lord looks at the heart.” 1 Samuel 16:7

This idea came from Jesus Rolon’s blog “Crafting the Word of God.”

http://craftingthewordofgod.com/2013/08/02/god-searches-our-hearts/

Materials Needed:

-cardstock

-contact paper or a laminator

-scissors, tape, glue or glue dots.

To save some time:

1.) I printed the templates (found at the link above)  on card stock.

2.) Cut out all the pieces.

3.) Instead of using contact paper, I colored the heart and laminated it with my table top laminator. (Disclaimer: I tried using contact paper but t makes me all flustered. It wrinkles and bubbles and causes me undue stress! That is why I took the easy route with the laminator.)

4.) Trace the circle on the laminated paper, around the heart, and glue dotted all the pieces together.


adventday14lightindarkness

The people who walked in darkness
    have seen a great light;
those who dwelt in a land of deep darkness,
    on them has light shone.” Isaiah 9:2

When my girls were little, I purchased a great advent resource called Truth in the Tinsel- An Advent Experience For Little Hands . Each day we read a scripture passage, created a simple craft ornament all while we talked about the scripture and the true meaning of Christmas. I loved pulling out the book and completing the activities. One year, my grandmother, mother, and sister made ornaments along with us. I still have some of the ornaments and they serve as good memories from that year. If you have little ones, this is a great resource for you. The ebook is only $7.99 and you could get started right away.  Day #11 ornament idea comes from the Truth in the Tinsel and goes along with December 11th’s reading of Unwrapping the Greatest Gift.


adventday15elijah

“38 Then the fire of the Lord fell and consumed the burnt offering and the wood and the stones and the dust, and licked up the water that was in the trench. 39 And when all the people saw it, they fell on their faces and said, “The Lord, he is God; the Lord, he is God.”  I kings 18:38-39

Materials Needed: 

-red ball ornament

-heart shaped sticker

-acrylic paint (red, orange, yellows, metallic gold)

-sponges or sponge brush

1.) Stick a heart shaped sticker in the center of the ball.  Carefully press around the edges to make sure sticker is sealed.

2.) Sponge fiery colors on the ball and over the heart sticker.

3.) Let dry.

4.) Peel the heart sticker away. If the paint seeped under the sticker, you can use a small amount of nail polish remover on a q-tip to remove the paint. Be careful to test the area first so it does not strip the red color.