Advent-“Unwrapping the Greatest Gift” Day 7-8-9-10 Craft Ideas

Advent Crafts
“Unwrapping the Greatest Gift” Ornament and Craft Ideas

This is Part 3 in a series of ornament/craft ideas that I think correspond with the daily advent readings from Ann Voskamp’s book “Unwrapping the Greatest Gift.”  Read about Day 1-2 here  and Day 3-4-5-6 here.You can find many ideas on the internet for Bible story crafts. Below are some of my original ideas and some that I modified from Pinterest. I gave credit for those craft ideas that I borrowed. If you decide to make and share one of my craft ideas, I would to love to see it. Tag me on Instagram or send me a link to your blog post. 🙂

day7altar

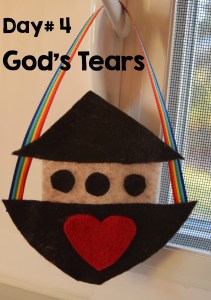
“After these things God tested Abraham and said to him, “Abraham!” And he said, “Here I am.” He said, “Take your son, your only son Isaac, whom you love, and go to the land of Moriah, and offer him there as a burnt offering on one of the mountains of which I shall tell you.” Genesis 22:1-2

Materials Needed

-mini wooden craft sticks

-colored tissue paper

-glue gun

1.) “Build” a fire with the tissue paper. Tape it in place, around the bottom, so it forms a flowery-bunch.

2.) Build the sticks around the fire, hot glue sticks in place.


Jacob's Ladder“12 And he dreamed, and behold, there was a ladder set up on the earth, and the top of it reached to heaven. And behold, the angels of God were ascending and descending on it!” Genesis 28:12

Materials Needed:

-Large Craft Sticks

-Mini Craft Stick

-Wood glue or hot glue

1.) Glue sticks together to resemble a ladder.

2.) Paint the sticks. (PS  I am sure when I do this craft with the kids, their ladders will be colorful, bedazzled, and might include a few angels on the steps.)


joseph's coat of many colors


“3 Now Israel loved Joseph more than any other of his sons, because he was the son of his old age. And he made him a robe of many colors. ” Genesis 37:3

I cannot wait to do this craft with my kids. I had fun making it and the colors mixed together so beautifully.

Materials Needed:

-Coffee filter

-scissors

-paper towels

-food coloring  (liquid), water

-bulb pipettes  ( We have the Coloring Mixing Set from  The Homegrown Preschooler  The set comes with pipettes. Amazon has them too.)

1.) Fold the coffee filter in half. Cut out the shape of a long-sleeved coat.

DSC_0599

2.) Put the coffee filter on top of a few layers of paper towels. Mix food coloring with a few drops of water.  You want the colors concentrated and not watered down.

DSC_0615

3.) Squeeze some color in the pipette and drop onto the coffee filter in a polka dotted fashion. The colors will start to run and blend into each other.

DSC_0602

4.) When the filter is completed covered with color, allow to dry. No two coats will be the same.


day10tencommandments

“And Moses summoned all Israel and said to them, “Hear, O Israel, the statutes and the rules that I speak in your hearing today, and you shall learn them and be careful to do them. The Lord our God made a covenant with us in Horeb. Not with our fathers did the Lord make this covenant, but with us, who are all of us here alive today” Deuteronomy 5:5

Materials Needed:

-dark colored cardstock

-gray and white crayons

-skewer

1.) Pressing heavily down on a gray crayon, color over the card-stock. Repeat with the white crayon. The colors should resemble stone.

DSC_0559


2.) Cut out the card stock to resemble two tablets.

3.) Use a skewer to write roman numerals.

DSC_0565

4.) Punch hole and hang on the tree.

Advent-“Unwrapping the Greatest Gift” Day 3-4-5-6 Craft Ideas

Advent Crafts
“Unwrapping the Greatest Gift”                  Ornament/Craft Ideas

This is Part 2 in a series of ornament/craft ideas that I think correspond with the daily advent readings from Ann Voskamp’s book “Unwrapping the Greatest Gift.”  Read about Day 1 and Day 2 ideas here. You can find many ideas on the internet for Bible story crafts. Below are some of my original ideas and some that I modified from Pinterest. I gave credit for those craft ideas that I borrowed. If you decide to make and share one of my craft ideas, I would to love to see it. Tag me on Instagram or send me a link to your blog post. 🙂

day3beadedsnakeMaterials Needed:

-Pipe Cleaner

-Pony Beads

-Googly Eyes

-Small piece of ribbon or paper for the tongue

1.) Create the head of the snake by curving one end of the pipe cleaner around itself a few times.

2.) Hot glue the eyes and tongue in place. Note: First, we tried using regular glue but it would not hold so we went with the hot glue gun.

3.)Bead your snake. (LESSON IDEA- You could incorporate patterns  (AB, ABC. ABBA) into this part. This is a great fine motor activity. My 2- 1/2 year old beaded the green snake by himself.)

4.) Fold over the tail and then wrap on the tree.

My inspiration for this craft came from Frugal Fun for Boys. See below for link:

http://frugalfun4boys.com/2014/10/09/pattern-activities-preschool-kindergarten/

day4godstears

The Lord saw that the wickedness of man was great in the earth, and that every intention of the thoughts of his heart was only evil continually. And theLord regretted that he had made man on the earth, and it grieved him to his heart. So the Lord said, “I will blot out man whom I have created from the face of the land, man and animals and creeping things and birds of the heavens, for I am sorry that I have made them.” But Noah found favor in the eyes of the Lord. Genesis 6:5-8

 Materials Needed:

-Felt

-Rainbow Ribbon

This craft involved a lot of cutting but once all the cutting was done, it was easy for the kids to put the shapes together to make the ark. It can double as a shape lesson too.

day5starnightlight

And he brought him outside and said, “Look toward heaven, and number the stars, if you are able to number them.” Then he said to him, “So shall your offspring be.” Genesis 15:5

Materials Needed:

-empty baby food jar

-flicker light

-black paper cut so it can fit snugly inside jar

-hole punch

-fabric for the cover

Using a small hole punch, punch holes in the black paper. Roll and unroll the paper a few times so that it fits snugly to the inside of the glass. Put a flicker light inside the jar. Cut a circle of black fabric to go between the top of the jar and cover. Decorate the top of the jar. Turn it on at night.

Here is a picture in the light:

DSC_0551

day6abrahamsarah

The Lord visited Sarah as he had said, and the Lord did to Sarah as he had promised. And Sarah conceived and bore Abraham a son in his old age at the time of which God had spoken to him. Abraham called the name of his son who was born to him, whom Sarah bore him, Isaac.[a] And Abrahamcircumcised his son Isaac when he was eight days old, as God had commanded him. Abraham was a hundred years old when his son Isaac was born to him.And Sarah said, “God has made laughter for me; everyone who hears will laugh over me.” And she said, “Who would have said to Abraham that Sarah would nurse children? Yet I have borne him a son in his old age.”  Genesis 21:1-7

Materials Needed:

-felt

This was another big cutting project but I think the ornaments turned out nicely.  Lots of hearts and layering of the fabric. The hair and beard were fun to make.

Advent-“Unwrapping the Greatest Gift” Day 1-2 Craft Ideas


Advent Crafts

The most wonderful time of the year is here. A time of anticipation, expectant waiting, and preparation for the celebration of Jesus’ birth. I cannot think of a better way to discover the treasures and gifts of this season, then with Ann Voskamp’s  The Greatest Gift and Unwrapping The Greatest Gift. 

God has been using these two books to speak to me and my family in many ways. Each day, it seems the devotion was written specifically for me, to meet me right where I am. I know that sounds a bit silly and impossible but it is true. The words are composed so beautifully, so descriptively, and so vividly, that they prompt my thoughts towards better things, redirect my heart to those who are hurting, and provide a salve for the hurt and broken places in my own soul. This is the season of hope, love, peace and God’s great gifts.

In The Greatest Gift, the lineage of Jesus is explored through familiar Bible stories and the colorful characters in Christ’s family tree. Each day there is a Bible passage, a devotional, and reflection questions. I love that the devotions are only a few pages long so that there is no excuse not to read them daily. The reflection questions keep me thinking ALL DAY LONG! They are not questions like- Who was Sarah and Abraham’s baby? or How many brother’s did Joseph have? They are questions that require me to search my life and the state of my heart.  My favorite part of each chapter is the “Unwrapping More of His Love in this World” section. These are tangible things that a person can do to show their love to God and others by serving, blessing someone’s day, or worshiping God through letter and song.

In conjunction with reading The Greatest Gift, I have been reading Unwrapping the Greatest Gift with the kids. These stories follow the devotional but are written to engage the whole family. The illustrations are exquisite. Free, downloadable ornaments are available when you purchase the book. Last year, I had the girls color each of the ornaments as I read the story to them. This year, I wanted to up the craftiness with making our own ornaments. (We love crafts in our family!) I also wanted a more hands-on lesson illustration that a craft would provide.

You can find many ideas on the internet for Bible story crafts. Below are some of my original ideas and some that I modified from Pinterest. I gave credit for those craft ideas that I borrowed. If you decide to make and share one of my craft ideas, I would to love to see it. Tag me on Instagram or send me a link to your blog post. 🙂


Day1Stump


“There shall come forth a shoot from the stump of Jesse,
    and a branch from his roots shall bear fruit.
And the Spirit of the Lord shall rest upon him,
    the Spirit of wisdom and understanding,
    the Spirit of counsel and might,
    the Spirit of knowledge and the fear of the Lord. ” Isaiah 11:1-2

Materials Needed:

-wood disc

(You can find wood discs at craft store, the Target Dollar Spot, or use some power tools and cut the discs yourself. I went the power tool route because power tools are fun! )

-skinny sharpie markers, paint

OR a pencil, a wood burner, paint

We live next to a small patch of woods and searched for the perfect dead branch to make this ornament out of.  Searching for the dead branch (on a cold, damp, and dreary day) really drove home the idea as to how miraculous and impossible (for all but Jesus) is it to have life come from something dead. We talked about how Jesus is a miracle and how he goes to impossible lengths of love for us.

After the discs had been cut, we drew a shoot with a pencil, wood burned over the pencil marking and then painted the shoot bright green.  This project was time consuming but the time could easily be cut down using pre cut wood discs, sharpie markers and/or paint.


day2createdbylove

 In the beginning, God created the heavens and the earth. Genesis 1:1

26 Then God said, “Let us make man[a] in our image, after our likeness. And let them have dominion over the fish of the sea and over the birds of the heavens and over the livestock and over all the earth and over every creeping thing that creeps on the earth.”

27 So God created man in his own image,
    in the image of God he created him;
    male and female he created them.  Genesis 1:26-27

Materials Needed:

-2-1/2″ styrofoam balls

-Mod Podge (Matte works best)

-blue and green tissue paper squares

-heart glitter paper (and heart punch)

-pipe cleaner

With paint brushes, we painted Mod Podge on the styrofoam ball and the stuck squares of blue and green tissue paper over the ball to represent the water and land.  Note: Larger tissue squares work better than smaller ones. And stick the pipe cleaner in the ball prior to doing the mod podge. It creates a handle to make gluing easier.

After the whole ball was completely covered with tissue, we gave it a generous coat of Mod Podge. Once dry, we added a heart-punched, glitter heart stuck on by pop-up glue-dots. “We were created by love, for love.”

I plan to post a few craft ideas at a time. Check back to see the new ones added and follow along with the fun.


Pumpkin Fun

Pumpkin Fun

Pumpkins oval, pumpkins round;

Pumpkins tumbling on the ground;

Pumpkins giant, pumpkins small,

Pumpkins lined against the wall;

–Virginia Kroll

Pumpkin books, pumpkin recipes, and pumpkin activities. The last two weeks of school have been centered around learning about one of fall’s favorite, brightly colored fruits as we said goodbye to October and hello to November!

I kicked off our Pumpkin Unit with an introduction and challenge to memorize Virginia Kroll’s “Pumpkins” poem. The poem is full of descriptive words and rhyming couplets.

On the first day, we read the complete poem (see link below.) We created hand and body motions to accompany the rise and fall pattern of the words as we read them. I found some great (and free) reading comprehension activities that went along with the poem and picked the activities that I thought would best be appropriate for the girls to complete.

Each day we worked on the poem, adding two lines at a time. We recited it at lunch, we recited it at dinner, we recited it over Skype, in the car, when we walked, at dance, just about everywhere we went. Even my two year old was reciting the opening line. By the end of the two weeks, the girls and I were able to recite the whole poem from memory.  It was an accomplishment for all of us.

PUMPKIN BOOKS:

When I was teaching in the public school system, I bought a lot of my own books. Consequently, I now have a great homeschool library.  Some fall and pumpkin books get pulled out every October. Here are a few favorites:

Pick a Circle, Gather Squares- A Fall Harvest of Shapes by Felcia Sanzari Chernesky

Seed, Sprout, Pumpkin, Pie by Jill Esbaum

From Seed to Pumpkin by Wendy Pfeffer

The Runaway Pumpkin by Kevin Lewis

Too Many Pumpkins

Too Many Pumpkins is one of my favorite, favorite pumpkin books. It is about a white-haired-lady named Rebecca Estelle and her cat Esmeralda. Rebecca has an unexpected encounter with a splattered pumpkin that causes a bit of a situation. A shift in perspective allows her to notice the goodness of her position and she is able to bless those around her. (Sounds a little like A Fierce Flourishing)

With this story, we worked on characterization, cause and effect, and sequencing events. You can get the same materials I used online at The Mailbox Education Center.

PumpkinsToo Many PumpkinsToo Many Pumpkins

FIELD TRIPS:

Our first pumpkin unit field trip included a trip to Rhode Island to visit my family and the Roger Williams Zoo’s Jack-o-Lantern Spectacular. The Spectacular was founded in 1988 by a former mail carrier who has put a team of professional pumpkin carvers together, called Passion for Pumpkins. The carvers spend 6 – 8 weeks creating 5,000 pumpkins to be displayed on the Zoo’s Wetlands Trail amid special lighting and themed music. 1 Some of the pumpkins were amazing (see below, Mother Goose and the Sound of Music.) The creativity is worth seeing. A word of warning though, the path is very dark, there are a lot of people, and some of  the displays are scary. If you have children (or adults, for that matter) who are sensitive to noise and crowds, this might not be the best place to take them. We quickly pushed through the crowds to avoid seeing the more spookier displays.

Mother Goose Pumpkin Sound of Music

The second trip we took was to the pumpkin “patch” (aka Garden Center.) We walked around trying to find all the pumpkins described in the pumpkin poem. After much deliberation, the girls each found the perfect pumpkin to take home to carve.

At home Dad took over as the art teacher. He helped the girls scoop out the seeds, pick a design, and show them how to carve their pumpkins. The pumpkin carving took a long time to complete but the final products- Mater, Puppy, Panda- came out fantastic.

Pumpkin carving Pumpkin Carving Pumpkins

PUMPKIN MATH:

After the carving, it was time to wash, count, and roast the pumpkin seeds. I read How Many Seeds in a Pumpkin? by Margaret McNamara. It is a great book to explore estimation and skip counting.

How Many Seeds in a Pumpkin

The girls estimated how many seeds they had and decided the best way to count their seeds were by skip counting by 10s. They got busy creating groups of 10s. I cut out circles, pumpkins, and square mats to help keep the groups separated. When all the counting was said and done, our pumpkins contained- 400, 562, and 466 seeds.

pumkin seed counting

Counting Pumpkin SeedsCounting Pumpkin Seeds

PUMPKIN RECIPE:

We like simple recipes. One day, we made Pumpkin Patch Dirt Cups. They were super easy to make and delicious. My kids got a kick out of how real the “dirt” looked. This idea and recipe came from Paintbrushes and Popsicles.

Pumpkin Dirt Cup Pumpkin Dirt Cup Pumpkin Dirt Cup

THE GREATEST PUMPKIN LESSON OF ALL

Finally, the best pumpkin lesson came from my husband’s sermon two weeks ago. During the service, he carved a pumpkin as he describe how we are the pumpkin and God is a brain surgeon, a heart surgeon, and an internist.  He explained that God needs to do brain surgery on us, scoop out the “junk.”  Our junk is then placed on the cross and we are forgiven through Christ’s sacrifice. Next, God performs heart surgery on us. He takes out our dark, broken heart and replaces it with one of love and light. He gives us the Holy Spirit so that we can shine our light bright in a hurting world. The kids were kept in the service and I think that everyone was engaged. It was a great visual with a great message!

 Pumpkin Guts Pumpkin

Tot-Time Tuesday-Autumn Mixed Collage

Tot-Time Tuesday- Autumn Mixed Collage

The first day of autumn was last week but the warm weather continues to linger in parts of New England. I am ready for autumn to make its full, glorious appearance and stay for good. Rainbow leaves, over-sized, comfy-sweaters, UGGs, fresh apples, and bright-orange pumpkins are some of my favorite things and I cannot wait to be reunited with them.

Last Wednesday, to get us in the right mood for fall, I read It’s Harvest Time by Amy Beveridge. It is a short, early reader that highlights all of God’s blessings in the season of autumn. I love these little, inexpensive Happy Day books (Tyndale House Publishers.) They incorporate faith, family, and values in interesting stories with brightly colored pictures.

It's Harvest Time

 After the book, I modified an idea I found in our Boz’s MOPPETS curriculum. I provided my son with a red paper plate and a variety of fall colored materials. The materials included pieces of orange curling ribbon, yarn, pipe cleaners, twine, sparkly leaves, and pumpkins (that I had purchased on clearance at the end of last season.)

fall collage

I put some Mod-Podge in a cup, gave my son a paint brush and demonstrated how to paint with the glue, then stick the item to the plate. I think that he enjoyed painting with the glue more than placing the items. When my girls were his age, they would have enjoyed placing the items (A LOT of items) on the plate over the gluing part. The differences in my children amaze me and makes me smile!

 Fall Collage

Unfortunately, I forgot to get a picture of the final product. BUT we will be doing this project again with real items we find outside. I am hoping for brilliant red maple leaves, yellow birch leaves, artistic designs of sassafras leaves, and brown acorns. We just need fall weather to come and stick around. It shouldn’t be too long now. Mark Twain was very correct when he said, “If you don’t like the weather in New England now, just wait five minutes.”

Tot-Time Tuesday- Traveling Time- Screen Free Ideas

Tot-Time Tuesday Traveling

We went on a short family trip over the weekend.  I knew that we would be spending a bit of time in the van- about 3 hours each way. Although the kids would have been thrilled to watch movies the whole time, I wanted at least one way of the trip to be completely screen-free. With a little research and a few Pinterest searches, I came up with some ideas.

Here is what we did…

Tot-Time Tuesday- TravelingTimes

We started our trip off with a quick trip to Wendy’s (no fast food judgments-LOL.) My son found a creative (and disgusting) way to entertain himself. I also had plenty of other healthy snacks on hand. Granola bars, dried fruit, pretzels, almonds, and Annie’s Organic Fruit Snacks. The fruit snacks were a hit. I rarely buy them so they were a treat for the kids to eat.

tot time tuesdy dressup tot time tuesday dressup 2

The Kid’s Meals came with a toy (King Julien’s crown) which provided about 5 minutes of entertainment.  And since we like to “Move it, Move it”….

Music and Traveling

We had some great music to listen to in the van. Yes, we are that family! We sing loudly and “dance” in our seats. Recently, my son has started to demand “MUCK” “MUCK” (translation “music, music”) from his car seat and we are happy to oblige with a “please” and “thank you.”

Our top music album choice this weekend was TOBYMAC’s ***THIS IS NOT A TEST*** This album was just released August 7th. It is a great collection of soulful dance and pop music. With family friendly and uplifting lyrics, it is hard not to move or be in a good mood listening to it.

Check it out! http://tobymac.com/

Coloring on a Car Trip

I was surprised at how long coloring occupied my little guy. Before the trip, I printed out free coloring pages of some of my son’s favorite things- tractors and monster trucks. I put them all on a clip board and handed him one crayon at a time. I was afraid to give him more than one as the whole crayon box would have been poured out. This was also a great time to practice and reinforce color recognition. “Oh, you want a GREEN crayon.” “Sure, here is a GREEN crayon.” It is amazing how much learning is done naturally.

bingo

For my older girls, I found some fun car bingo sheets. We are still working on reading skills, so I loved the one from Stuck On You. This BINGO sheet had pictures AND words. It was simple and clean looking.  (link below)

Click to access cartripbingo.pdf

For older kids try: http://www.free-puzzles.net/travel-games-for-kids/printable-games/scavenger-hunt/scavenger-hunt.pdf

Gold Balls and Pipe Cleaners

We did not get to use this in the car but we used it in the hotel. I found this idea online and modified it for my family. I purchased practice golf balls and had a bunch of pipe cleaners. The kids stuck the pipe cleaners through the holes (fine-motor skills) and created “creatures.”  Or try to lace one pipe cleaner through all the holes. I tried but couldn’t do it.  Even my husband got in on the fun. 🙂

pipe cleaners pipe cleaners and golfballs

I was prepared with other ideas but we did not have a chance to use them. I came across some cute and great resources on Dating Diva’s site . http://www.thedatingdivas.com/tara/the-road-trip-date

Their Road Trip FINAL QUESTIONNAIRE  was great but the questions were geared for a husband and wife trip. I came up with my own questionnaire that could be used with the whole family. (See PDF below.) It’s going to be a great way to get the family talking on our next road trip. Something to look forward to on our next adventure!

Road Trip Family Questionnaire
Click below for PDF

Road Trip Family Questionnaire

Hesitation

I hesitated to start this blog.  Conversations with other moms, about mommy-blogs, produced chuckles and comments like:  “Why would she want to write that?” “How does she have time to write a blog? I barely have time to ..xyz…” Not wanting to be the receiver of those chuckles and comments, I laughed along and kept quiet my own desires to one day start a blog.

In the safety of a few friends, I have shared my thoughts about wanting to blog and in those conversations it was ME who chuckled and made the comments. “But who would want to read what I write?” “Do I really have something to say?” “Writing is not my strong point.”  Those dear, encouraging friends smiled, encouraged me to write, and assured me that they would read what I wrote. Time after time I have talked myself out of it, convinced that “blogging” was not for me. My stalling to be out of a lack in self-confidence and self-consciousness about sentence structure and grammar. (I’ll save the topic of my struggles with a Type-A personality for a future post.)

Days and months went by, but the desire to write and share my ideas persisted. Then came an opportunity to write a few paragraphs for a leadership website. I tried to ignore the opportunity. I tried to not think about what I could write about or the things I could say. I tried to convince myself that I was not a writer and someone better than me could write it. But the harder I tried to stop thinking about it, the more I thought about it and the only way I could get “it” to stop (what ever “it” was) was to sit down and type everything that flowed out of my mind and heart. It felt so good! Therapeutic!

After my initial word and thought “dump,” I took time to add and delete and improve my writing. It was like crafting but without the glue, ribbon, and paper. When the post was finished,  it was more than accomplishment, it was like something that had been stirring inside me was brought out and was staring at me on the paper (or I should say on the computer screen.) I know, that sounds very dramatic but that is exactly how I felt. I decided to send the passage in with no expectations, just thankful that I had accomplished the task. Long story short, the post was picked and posted to the website. And that small bit of writing is what gave me the confidence to write some more and start this blog.

I teach my kids that they should try new things and press on in difficulty. I tell them the more they practice, the better they will become. I also tell my kids that God made them perfect just the way they are, what others say or think should not change what they want to try or who they want to be (in a negative ways, of course.)

I want to write because it is a challenge for me. I know I have a lot to learn. It is a chance to improve myself in a new and interesting way and be an example to my children.  I want to write because excuses, hesitations, other people’s thoughts, and missed opportunities is not the way to fully live. This is an opportunity to take my own advice and practice what I preach one blog post at a time.

The journey of a thousand miles begins with one step.- Lao Tzu

EVEREST- Vacation Bible School-

Everest- Group Publishing

This past weekend,  our church held its annual Vacation Bible School program. This year’s theme was “EVEREST- Conquering Challenges with God’s Mighty Power” by Group Publishing.  Church members and the greater church community came together to put on an amazing weekend for about 100 children.

Some churches have a morning program, some have an evening program, but our church has a weekend program.Weekend Vacation Bible School begins on a Friday night, goes all day Saturday, and concludes Sunday morning in a dynamic, high-intensity, family friendly worship service. Five years ago, we switched our format from a week-long, evening schedule to a jam-packed, weekend schedule. Those who worked during the week, were freed up to volunteer on the weekend and our volunteer base increased. The evening program was exhausting for all who attended and volunteered. Some parents told us it was hard for their children to be out so close to bed time. The weekend program was one session at night and “three” day time sessions. It was a successful change and we have been improving and making fine adjustments since .

After stepping down as VBS Director, my involvement with VBS came in the form of heading up decorations. My husband and a great crew of creative people help me bring my grand decorating visions to life. I love working on these types of projects.  People, that may or may not have ordinarily spoken to each other, working side by side towards completing a common goal.

Big projects like this lead to discussions. Discussions lead to discovery. Discovery helps find similarities, common ground, and form and strengthen friendships. As the leader of my Creative Bunch, the completion of the decorations were not the things that made me happiest, it was the conversations and relationships that were built.

Here is a showcase of our work:

Our Stage and Crew Signs–


EVEREST Stage- We created three mountains out of wood and white bulletin board paper. It was less expensive and at disposable time -better for the environment.  We followed the directions Group provides for the large cloud at the top of the mountain. Our letters are made out of kickboards from the dollar store. The backdrop we purchased from Group.
EVEREST Stage- We created three mountains out of wood and crumpled, white bulletin board paper. Compared to foam, it was less expensive and better for the environment. For the large cloud, we followed the directions Group provides. Our letters were made out of kickboards bought the dollar store., silver paper, and fiberfill. The backdrop panels were purchased from Group.

Everest VBS Stage Icy Letters

Icy Letters  Crew Signs

Our Entryway–

Everest- Vacation Bible School
Winter Tree with Trail Marker Sign– This tree was created for the Weird Animals VBS theme. Since then, it has been transformed many times and has become a fixture in our church (to the dislike of some-lol.) We brought the tree back to the forefront and decorated it for winter. We created the large snowflakes from paper, made a trail marker sign, and hid Yeddy (a Bible Buddy) in the small pine “forest.”

Yeddy Bible BuddyTrail Sign MarkerPaper SnowflakesBase Camp Store– My husband created this store from an old chalkboard, choir risers, and some old doors. One of my volunteers did the chalk art. We filled the store with donated items.

Base Camp Store           Everest- Vacation Bible School

Prayer Flags- On lightweight fabric, I wrote the names of each child that would be attending VBS. I included the names of each Junior Crew leader, the VBS Directors, and Pastors of the church. The flags were a colorful addition in the entry way. During the weekend, I noticed children and parents finding their flags.

DSC_0985      Prayer Flags- Everest VBS

Hallways and Walls- We covered bulletin board with the plastic snowflake drop, added paper mountains, and some fiberfill clouds. Our Ice Cave was created with PVC pipes and tableclothes. For added effect, we had planned to use a fog machine in the ice cave. We tried the fog machine a few times during the week without incident. However, on the first night of VBS,  my husband started the fog machine just before the first station rotation. It triggered the smoke alarm and the whole church needed to be evacuated. Thankfully, it took about 15 minutes from alarm start to getting back into the church. This was not the first visit from the fire department during a VBS weekend but we hope it will be the last.

How was your VBS? What VBS curriculum does your church use?


Snowflake Wall  DSC_0561 Ice Caves